Rules For Watering Your Garden

Watering your garden on a timely basis is important.

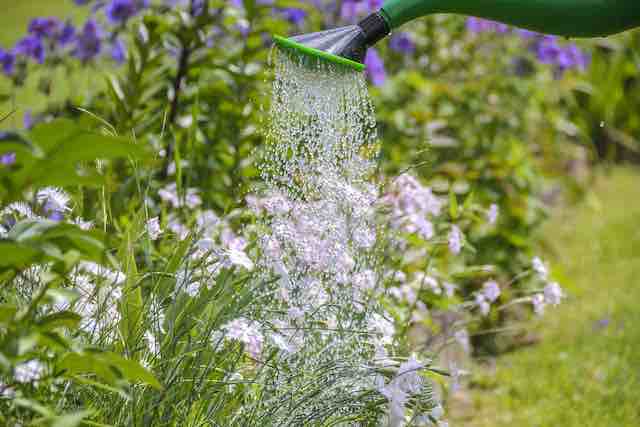
If there is one type of question that anyone in the horticulture industry gets asked more than any other, it has to be about watering strategies. The problem is that there is not one solution.

You see, gardens are filled with an abundance of different plants. Each of those plants has it’s own requirements when it comes to watering. Then you need to add in all the different types of soil conditions as well as climates and you’ll quickly come to the conclusion that there is not one final answer.

Different Plants Have Different Requirements

The number of different watering requirements are almost equal to the number of different plants out there.

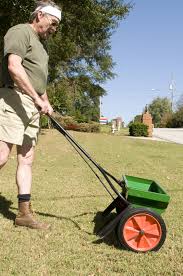
For example, a typical lawn in a residential neighborhood, requires consistent moisture in order for it to be as healthy as it can be.

On the other hand, many different types of trees and shrubs can survive with less water and occasionally suffer some drought stress without leading to death.

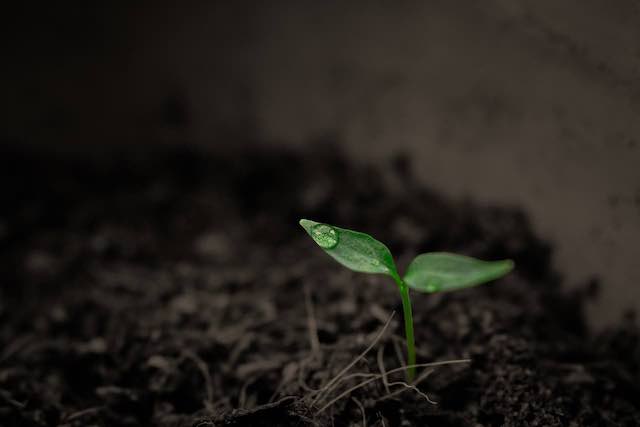
Yet, there are still other plants, such as those that have adapted to withstand drought. Despite you needing soil to dry out completely between waterings, these miraculous plants are able to go weeks and sometimes months without water.

Determine Soil Moisture

Don’t be too quick to want to know how to water. It’s important that you first understand the difference between wet and dry soil. In order to do that, think of soil like a container.

Like any container, it can be filled to the brim and even spill over if filled up too much. The container, or the soil, can provide all the water required even when not filled to overflow.

How Soil Moisture Works

Soil experts classify soil moisture in two different ways. The first is called saturation and the second is called field capacity.

Saturated soil is wet. Like our example above, it’s like a container that is filled to overflowing. You can see this on the surface of the soil because there are puddles. Excess water runs off it. Despite all this water eventually draining away, the roots of the plants may suffer from a lack of oxygen which is not good.

When it comes to field capacity, the soil pore spaces are filled with water and the plant can take up water easily. This is like the container example above where it’s filled just below the brim. The plant has all the water it could need.

With this in mind, this will help you determine how to relate to the soil. It will give you a far better idea of an effective irrigation schedule.

Check The Soil

Start checking the soil in spring. It is at this time when the soil generally contains the most water. Using a garden tool, turn over some garden soil. Grab a handful of soil from two to three inches below the surface.

Waterlogged, saturated soil will drip water. If your soil is clay or sandy loam, need this handful to see if you can squeeze a little water out. Because sandy soil doesn’t stick together, juggle the handful, and look for water droplets. Whenever you can see free water and soil, it is saturated. Saturated clay soil will also be extremely sticky.

At field capacity, most soils will feel similar. When squeezed no water drops appear but your hands feel damp.

As soil continues to dry it will reach the stage of 75% of field capacity. At that point it contains plenty of available moisture for most plants. Sandy soil starts to hold shape when squeezed and loams easily form a ball when squeezed.

Clay soils are pliable, and they can easily be formed into a ribbon. There is plenty of oxygen in the soil. 75% Field capacity is the ideal for most plants, so when you water, this is the stage to aim for.

The emergence of a green stem brings delight to see nature faithfully at work.

When is soil reaches 50% field capacity, it is almost time to irrigate. That’s the gauge you can use. The soil will look and feel dry which is an effective test to do. However, it’s important to note that many cells will have plenty of water stored just a few inches below the soil surface. Keep this in mind.

Remember that plants in clay soil are most likely to have enough water to sustain them. On the other hand, plants in sandy soils might need more.

Keep in mind that a soil reservoir contains more water than you might think. Not to worry though, if you overwater, the majority of plants will recover quickly and fully.

Use An Indicator Plant

Some horticultural experts recommend that you select and watch an indicator plant in your garden. What this means is that they choose one plant that is likely to wilt first and show signs of drought stress. When you see that one plant struggling, you know it’s time to water.

As you gain experience with your lawn and garden, you’ll become an expert in timing irrigation to line up with the conditions in your yard. You’ll know that obviously, a tomato plant needs more regular watering than a willow tree.

As time goes on, your job will be much easier when you group plants with similar water needs in the garden.

It’s important to look for a 75 field capacity when watering. This is key to maintaining the right level of watering.

Fertilizer Spreaders

If you find that you need to fertilize a large area of lawn then you will want to use a push type spreader. There are 2 types of spreaders: drop and rotary.

Drop spreaders

What you’ll find with drop spreaders is that they have an agitator that is the width of the hopper. Naturally what happens is that the fertilizer granules will drop straight down through the openings in the bottom of the spreader. You can adjust the openings in order to regulate fertilizer flow. Be sure to look at the label of the fertilizer package for proper application rates.

Drop spreaders are far more tricky than broadcast spreaders. This is because they deliver product directly beneath the hopper. You have to be accurate.

It is important that you slightly overlap each one of the applications to avoid striping your lawn. Be absolutely sure that you turn off the spreader when stopping or making turns.

In order to help with the accuracy, drop spreaders are low to the ground and might be more difficult to push than a rotary spreader.

You may also find that they skip every now and again. Despite that negative, they provide a definite application. They work wonderfully for sidewalks, gardens, smaller lawns, and swimming pools.

Broadcast and rotary spreaders

Broadcast spreaders are also known as rotary spreaders. How they work is they drop the fertilizer from the hopper onto a rotating disk that propels the granules outward. These types of spreaders are the best for large areas that require fertilizing.

Naturally, you’ll need to clean up any overspray when using these types of spreaders. This is because some fertilizer formulations can stain surfaces. As mentioned in the previous article, excess fertilizer will wash into a storm sewer and cause pollution.

How to spread fertilizer

If you happen to catch one of your local lawn care experts at a property, you’ll see that they walk at a casual, even pace. They can be seen either type of spreader.

Be careful to never pull a spreader backward. It is often an easy thing to do because there are numerous times it seems to be the way to go. Refuse to do that. The reason is, either type of spreader will apply far more fertilizer when pulled. This often leads to burning the grass and you almost always see a lawn or two in your neighbourhood that has done this.

How to apply liquid fertilizers

The third means in which to apply fertilizer is as a liquid. Liquid fertilizer applicators include hose-end sprayers which are the most common. You will also find injectors.

When using a hose-end sprayer, you place liquid or soluble fertilizer in the sprayers container. As water flows through the sprayer it mixes with water at a set application rate (the product will either have fixed or will tell you what rate to set it at).

When it comes to injector applicators, they are different in that they allow you to apply fertilizer through sprinkler or an irrigation system. Don’t worry, they are not too hard to use.

The injector is attached to the faucet and a flexible siphon tube is placed in a bucket of concentrated liquid fertilizer. The fertilizer is pulled up through the tube and mixed into the water.

In conclusion

You now have a great idea of how to apply fertilizer. There are advantages and disadvantages to all three. In order to ensure the best results, only wet the soil with fertilizer. Of the three, liquid fertilizers can produce dramatic results in very little time. However, the results are often short-lived, so choose how you apply fertilizer wisely.

Making Your Lawn Green

Healthy green grass.

There are countless ways in which to get your grass or plants looking green and that also goes for there being a wide variety of different types of fertilizers. The first most important step in getting the plant green with an application is to always carefully reading and following what the label on the fertilizer says.

Don’t be fooled by trying to put down twice as much as the recommended does thinking you are doing your lawn or garden a favor. You’re not. Too much fertilizer can easily burn grass plants and negatively affect soil chemistry. We haven’t even mentioned the potential damage to the environment as well.

The best rule of thumb is if you notice that a label gives you a range of application rates the best thing you can do is go with using the smallest amounts. You can always add more if needed but if you put down too much fertilizer, the damage is done, and it’s too late to fix it.

When To Apply Fertilizer

The best time to get your spreader out of the garage and apply fertilizer is during the time that the plant is actively growing. Another great time is just before it steps out of dormancy.

Spring is considered the ideal time and fall is a close second.

Keep in mind that if you fertilize your plants in the fall, only use half the amount of fertilizer you would apply in spring. This is important. You do not want to use a fertilizer formulation with a lot of nitrogen because high nitrogen will encourage the plant to grow. Growing that late in the season will certainly lead to some or all of the plant dying in winter.

Don’t worry if you miss the fall window of opportunity as you can always get it next time. Plus, plants will not absorb any nutrients when the soil temperature drops below about 4 degrees Celscius.

As we mentioned earlier, the rate of application and how you go about doing that depends upon the type of fertilizer your acquire.

Time To Plant

Before you roll up your sleeves and get planting, be sure to incorporate fertilizers into the soil first. This will ensure that nutrients will be available at the root of the plants in time. This is exceptionally helpful for assuring the availability of nutrients that do not easily move through the soil. One such nutrient is phosphorus.

What you first want to do is spread the recommended amount of fertilizer on the surface of the soil. Then you want to rototill it into the soil about one-half foot to one full foot down. Make sure to do so as evenly as possible because large clumps of fertilizer can burn plant roots which is never good.

Another strategy is placing fertilizer right in the planting hole. This is usually done for slow-release organic fertilizer. You can really give your bulbs a boost by sprinkling a teaspoonful of high phosphorus fertilizer in planting holes before you plant.

A third fertilizer strategy are fertilizer tablets. These are a popular choice for new tree, shrubs, and water garden plants. The tablets are very simple to use and will not burn roots. Again, follow what the label instructs you to do.

You place the fertilizer tablets 3 to 6 inches below the surface of the soil. You’ll want to position them a few inches from the root ball to supply the plant with fertilizer after it overcomes transplant shock.

Using Granular Fertilizer

Look around and you’ll see that broadcast applications are the most common way that landscape gardeners apply granular fertilizer. It is simply the ideal way to distribute fertilizer.

If you’re wondering what the term “broadcast” means, it is when a person spreads fertilizer evenly on the soil surface. If you need to broadcast in small areas and in garden beds simply measure the amount of fertilizer you need and throw by hand across the desired area. Home and garden stores also sell a handheld rotary spreader to apply the fertilizer which some find easier to use.

Hands down, broadcast fertilizing is one of the most effective ways to fertilize large trees if that is on your “To-Do” list. The last, most important, thing to do after you are finished fertilizing is to irrigate the fertilized area well and to wash the product off foliage. This will help transition the nutrients down towards the plant roots.

Whats New At CJ Lawn Care?

Hey there! We have some interesting and exciting intel to reveal to you. We are working behind the scenes to get this website back up and running with all kinds of landscaping tips and tricks.

Anyway, be sure to keep an eye on the site. We will be releasing some super cool content in the near future. We can’t wait to share it with you. Thanks for stopping by today!